Well it has been just under a week and I am still in love with my bench. It really just adds to the overall feel of the room. I’ll just say it wasn’t as hard as I thought it was going to be. There was a lot of starting and stopping to allow for the stain to dry, and the wood glue to dry but really this didn’t require a lot of material, money or effort. The stain smell does linger though to make sure you have good ventilation.

1 – 2x10x10 Oak or White Fir Board cut into 3 pieces (Mine was 1 – 60″ board and 2 – 23″ boards) NOTE: Lowe’s and Home Depot do this for FREE ~
Measuring Tape ~ Wood Glue ~ Stain of choice with Polyurethane (I used MinWax in Mission Oak Satin finish) ~ natural bristle paintbrush ~ level ~ #220 grit sandpaper ~ Hammer and/or scraper ~ 8 – #6×1-1/4″ wood screws ~ (Electric) Screwdriver ~ Chalk or white pencil

Purchase your board and have them cut them down for you with one board for the bench piece and 2 for the legs. Using a hammer and scraper age and cut the wood. I used the hammer to smash all sides of the wood.
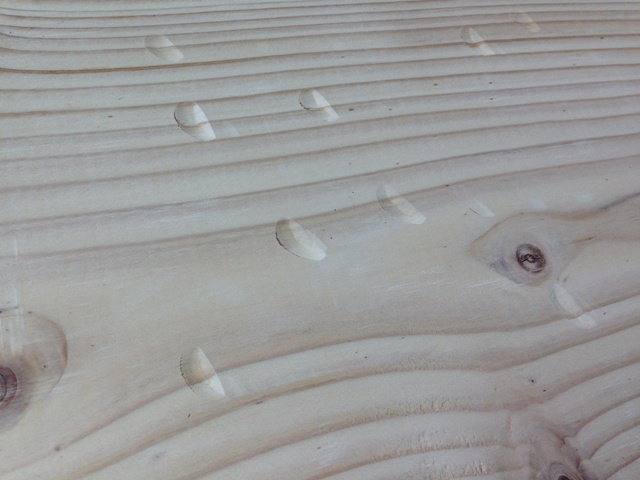
I used the scraper to rough up the sides and held at a 45 degree angle to cut slices into the wood.


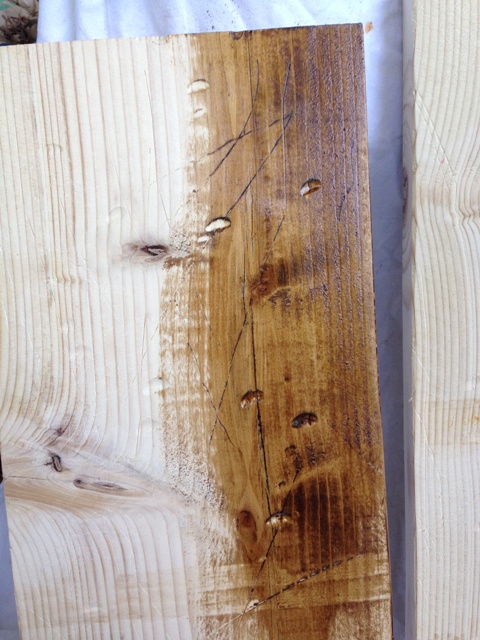
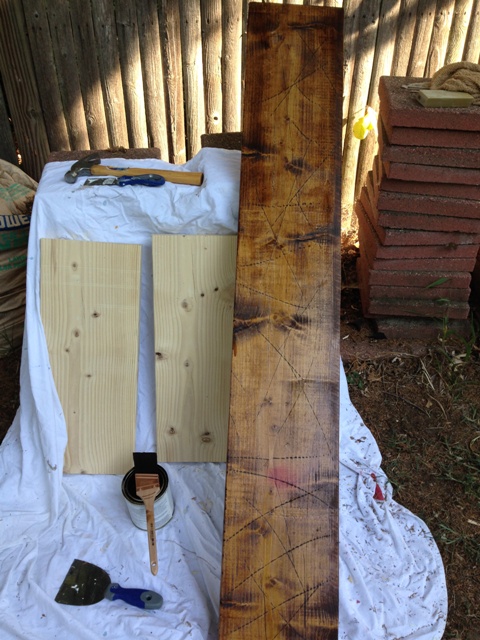
Once dry determine if you want another coat and repeat until you reach the desired color. I ended up with just two coats.
TIP: To remove the stain from your hands rub some baby oil all over your hands, rinse and then wash with soap. The stain should come right off.
Once completely dry you are now ready to assemble the bench. Gather supplies needed.

I wanted a Pagoda style feel so I measured 12″ from the ends and marked with chalk, using a level to make sure you get a straight line. Apply wood glue to one end of the leg and place on the line.
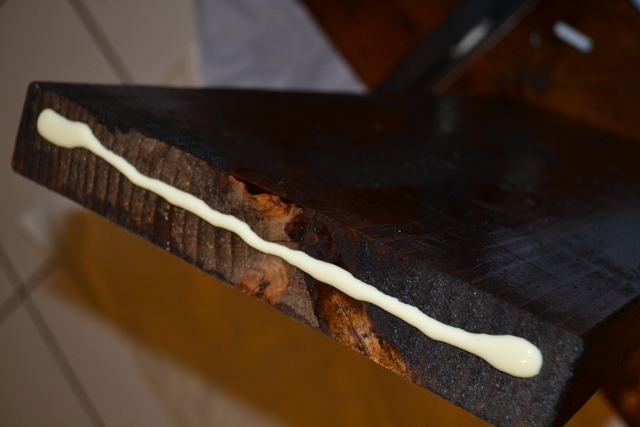
Once dry I placed 4 screws in each leg at a downward angle, 2 on each side. Two on the outside, two in the inside.

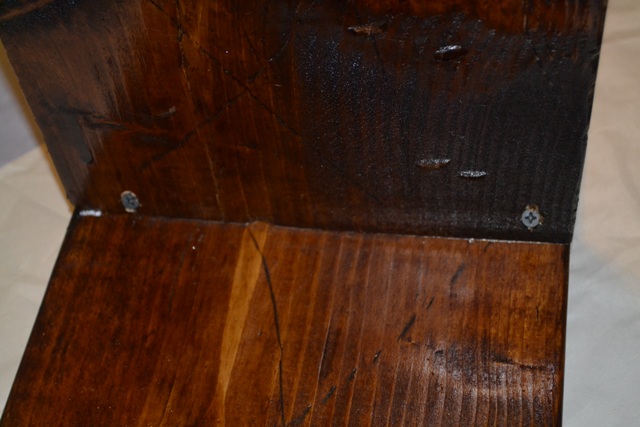
Turn it over and you are done. You can add an optional 2×4 board between the legs under the bench for added support to the legs. Since this is more decorative I chose not to add it but may add it in later.

So to break it down it really is just a few steps…prep the boards, paint, assembly, enjoy! The drying time is the time consuming part but it really is worth it. Now to make a few more projects.
Next week I will outline how to make the side tables and where I got all the accessories. What do you think, will you make your own bench?
I’ve also joined some amazing ladies to bring you a giveaway worth winning. These are all girls on my daily reading list, so check them out if you don’t already follow them.


i LOVE LOVE LOVE this! you are a better person that me – i would have made my husband do this 😀
Thank you. If I had a husband who could do it, I would have passed it off, though I am proud I tackled it myself.
You continue to love it and I will continue to be impressed!
Why, thank you. 🙂
Congratulations on the DIY!!! It looks so good!! Thanks for the great giveaway!! Crossing my fingers!
Thank you. I was excited for it to be finished and in the room. Good luck!
SUPER CUTE! And what an EASY DIY!
Love it.
We are thinking of making our own headboard and bed frame (currently, we are epic hippies, with a box spring and a mattress on top). Just need to find the time to do it! hahaha
Thank you. It really adds to the room. Finding time is so hard but I finally had a free weekend.
I love the bench and it sounds super easy to make, now if I could find the charge for my electric screw driver I’d be all set.
Thank you. Yes, much easier than I thought it would be. Luckily my drill is also a screwdriver but finding the screw bits were rough going for a few minutes! 😉
It looks great! You’re so handy…. you about lost me at the staining stage 🙂
Haha! That is the easiest part!! I was so happy with it, I can manage the basics that’s it.
I’m very impressed! I didn’t know the stores would cut the wood…you just give them the measurements?
Yup! I told him my project and what I wanted it to measure and he helped me pick the size board and cut it down. The machine doesn’t do really thick boards but 2″ boards are a piece of cake for them. You can cut it into as many pieces as you want too.
I love this and how you created that rustic look. The stain color that you picked couldn’t be more perfect!
Thank you. Yes I really wanted an aged rustic look. I agonized over the stain color, so thank you. 😉
Very nice tutorial! I know I will never attempt anything like that ever! LOL! I will not even spray paint anything. I get impatient and just want to get things done sometimes! I applaud all of you girls for stepping into territory where I have never been. Your whole bedroom makeover looks often and your sense of satisfaction is an added perk.
Love, SMD’s Momma
Haha! I know it’s not for everyone. 🙂 I think I would much rather buy things but I seem to never be able to find what I want. Thank you. I was really happy with it though I am sure in a few years I will want to change it all again!
Your bedroom looks AWESOME not often Didn’t proof read!
SMD’s Momma
Thank you so much!
I wish I could explain how impressed I am that you do all of this home improvement stuff! I would be at such a loss! I usually call my stepdad crying haha
Thank you. Unfortunately my Dad isn’t all that handy so I either pay someone to do it or try it myself. I am a girl on a budget so I attempt it myself first. 😉
You made that??! It looks amazing– we need a bench for our room for sure and this looks amazing (I already said that, haha, but it really does!)
Yes, thank you. I think you should give it a try. You can make it as short or as tall as you want.
Your bench is absolutely beautiful! And even more special since you made it yourself!
Thank you so much. Yes it means more since I made it.
What an awesome giveaway – thanks!! And I LOVE that bench!! We have room now at the bottom of our bed, so I’ve really been wanting to buy (or make!!) something to add a little more storage!
Thank you! My bed post was always in the way but I removed it to make room totally worth it!
oh my gosh you are so fancy!!! i love it. i am definitely not good enough to build a bench, baby steps with the DIY lol
Awww thanks. This was my first building project. Go big or go home, right?!
I wouldn’t have thought of creating/making my own bench in a million years!! It looks great.
Thank you. I am not sure why I thought I could do it, but I am glad I did it.
This really turned out so cute! Seriously… Martha. Fucking. Stewart!
Thanks! Haha! I don’t know if I would go that far! 😉
Ah, I love this!! It turned out awesome! Good for you for making it yourself…I would never have thought of that!
Thank you. I was so happy with how it looked in the end.
this is awesome! damn, girl!
Thank you. I can’t believe I made it.
that turned out sooo well! great job!
Thank you! I was really proud of it.
LOVE the bench! My furniture assembly only goes as far as IKEA furniture. I can wield a mean allen wrench though.
IKEA furniture is no joke. This might be easier than doing that furniture. Haha!
It turned out so well, Kerry!
Thank you! I am so proud of it!
Go you!!! I am so not handy … but even I can try this one!
It was easier than I thought it would be.
I LOVE it!!! I’ve been looking for an idea for the foot of my bed 🙂 Might have to copy you!
I would love it if you did!!